Per-hunter build routes
Start with the face and the engine you recognize. Each route below keeps the core visual signals together so you can identify a useful drop without reading a wall of item names.








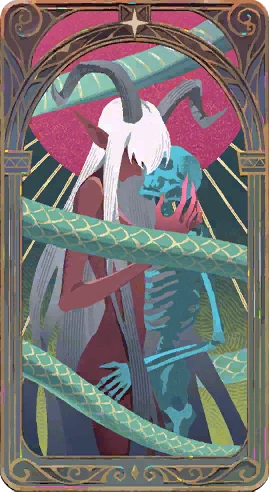
Tarot / Starlight
Stella
Starlight and Tarot route — plus a straight answer on how strong she actually is.
Open route

Marks / dodge
Elena
Mark, dodge, and counter-fire route — focused damage with a clear movement check.
Open route

Coins / economy
Lanny
Coin economy route — turn a reserve into upgrades before it becomes a vanity score.
Open route




- Long Tong — S-tier Amber companion engine — one element, amplified twice.
- Jenny — S-tier dismantle economy — every bad drop becomes fuel.
- Stella — Starlight and Tarot route — plus a straight answer on how strong she actually is.
- Elena — Mark, dodge, and counter-fire route — focused damage with a clear movement check.
- Lanny — Coin economy route — turn a reserve into upgrades before it becomes a vanity score.
- Marcus (beginner) — The most readable first route: Extra-Shot Crit.
- Jester route — The crit-window blueprint in the build guide.
Start from the question you actually have
Want to test a combination first? The build planner scores tag synergy and flags conflicts before you commit a run to it.
Need help during the run? Use the first-run guide, shop and reroll guide, or the failed-run review.
How a build actually forms
A build in Pass the Fear is not a shopping list you assemble from a guide. You get offered a small number of things at a time, and the build is whatever survives your choices. That means the useful skill is not memorizing a finished loadout — it is recognizing which of the two or three things in front of you feeds what you already have.
Three questions decide almost every pickup. Does it produce more of an event you already pay off? Does it match the element your relics and Tarot reference? And is it better than the thing it would replace, counting the slot cost? Rarity answers none of those, which is why rarity is the last thing to look at rather than the first.
The archetypes below are how players group builds after the fact. They are useful as a target to steer toward once a run shows you what it is offering — not as a plan to force from the first room.
Which route to pick first
If you are new, take the Marcus Extra-Shot Crit route — it is the most readable version of the game's core decision pattern, and it fails in obvious ways you can learn from. If you want the highest reported ceiling, the Long Tong Amber companion engine concentrates everything into one element. If you hate wasted drops, Jenny's dismantle economy turns bad rooms into fuel. And if you want the build with the most rules to exploit, Stella's Starlight and Tarot route is the one — with more setup and more room for a run to miss its conditions.
Whichever you pick, check which patch changed what before trusting any guide, including this one. Updates have been landing every few days.
The five build archetypes
The archetype names below are how the community groups builds. The trigger keywords in brackets — [Embarkation], [Final Shot], [Growth], [First Shot], [Destination] — are official terms that appear in item text; the groupings themselves are player convention, not an in-game menu.
Shatter (Frost)
Frost weapons such as Dark Ice and Ice Shatterer build Freeze. Shatter builds stack Freeze quickly, then convert frozen targets into burst damage through Shatter effects on relics and parts. The archetype trades sustained damage for control: groups stop moving, then break at once. Solo players often favor it because control reduces the pressure of dodging alone.
Disruption (Lightning)
Lightning families like Lightning Gun build Disruption, interrupting and chaining between enemies. Disruption builds want frequent hit events — fire rate, extra shots, chain effects — so the Transmutation applies constantly across a room. Patch 1.0.479 touched several Disruption-related triggers, so compare older advice with the current effect text before copying it.
Growth (stacking)
[Growth] stacks reward effects that accumulate across a run. The High Priestess (Upright), for example, converts a share of overhealing into Growth stacks. Growth builds are patient: weak early, strongest late, and they pair naturally with economy Hunters like Lanny who extend the run's resource curve.
Embarkation (run-start triggers)
[Embarkation] effects fire when you set out. Relics like War Horn (permanent max Bullet Attack on Embarkation) and Executioner's Axe (Physical Damage growth from Embarkation) define the archetype, and Tarot multiplies it: The Fool (Upright) triggers Embarkation effects one additional time, while The Fool (Reversed) triggers them all twice when you dismantle an Embarkation relic — a real synergy with Jenny's economy.
Final Shot (magazine effects)
[Final Shot] and [First Shot] effects key off magazine position, so the archetype favors small magazines and fast reloads — the fewer bullets per cycle, the more often the trigger fires. The Magician turns [First Shot] into a Magic Bullet; reload relics like Magician's Hat compress the loop. Charge weapons and large magazines work against the archetype.
How to choose
Start from your Hunter's engine, not the archetype. Long Tong and elemental archetypes reinforce each other; Jenny feeds Embarkation-dismantle loops; Marcus's extra shots serve Disruption and Final Shot equally well. The archetype is the direction the run offers you — the Hunter decides how much of it you can use.
How to use these routes
Trigger keywords and item effects are kept aligned with the current game data. Archetype names are simple player shorthand, so use them to find a route that matches your run rather than treating them as a fixed ranking.